docker-compose.yaml
version: "3"
services:
  rabbitmq:
    image: rabbitmq:3-management-alpine
    container_name: rabbitmq-stream
    volumes:
      - ./etc/:/etc/rabbitmq/
      - ./data/:/var/lib/rabbitmq/
      - ./logs/:/var/log/rabbitmq/
    ports:
      - "5672:5672"
      - "15672:15672"
    environment:
      RABBITMQ_ERLANG_COOKIE: "RabbitMQ-test"
      RABBITMQ_DEFAULT_USER: "admin"
      RABBITMQ_DEFAULT_PASS: "rabbitpassword"
docker-compose up

해당 컨테이너로 접속 후 아래의 명령어를 실행
$ rabbitmq-plugins enable rabbitmq_management
docker-compose에 설정한 username / password로 접속
rabbitmq 서버에 큐를 생성하고 메시지 전송
import pika

# RabbitMQ 서버에 연결합니다.
credentials = pika.PlainCredentials('admin', 'rabbitpassword')
connection = pika.BlockingConnection(pika.ConnectionParameters('localhost', credentials=credentials))
channel = connection.channel()

# 큐를 선언합니다.
channel.queue_declare(queue='hello')

# 메시지를 보냅니다.
channel.basic_publish(exchange='', routing_key='hello', body='Hello, RabbitMQ!')

print(" [x] Sent 'Hello, RabbitMQ!'")

# 연결을 닫습니다.
connection.close()
127.0.0.1:15672 에서 생성한 큐와 메시지갯수를 볼수 있음.

메시지 consume 코드
이전에 보낸 메시지를 받아 출력하는 콜백 함수를 사용하여 RabbitMQ 큐에서 메시지를 수신.
메시지를 보내는 쪽과 받는 쪽을 함께 실행하면, 보낸 메시지가 받는 쪽에서 출력되는 것을 확인.
import pika

def callback(ch, method, properties, body):
    print(" [x] Received %r" % body)

# RabbitMQ 서버에 연결합니다.
credentials = pika.PlainCredentials('admin', 'rabbitpassword')
connection = pika.BlockingConnection(pika.ConnectionParameters('localhost', credentials=credentials))
channel = connection.channel()

# 큐를 선언합니다.
channel.queue_declare(queue='hello')

# 메시지를 받을 콜백 함수를 등록합니다.
channel.basic_consume(queue='hello', on_message_callback=callback, auto_ack=True)

print(' [*] Waiting for messages. To exit press CTRL+C')
channel.start_consuming()
100만개의 메시지 생성 및 receive 테스트
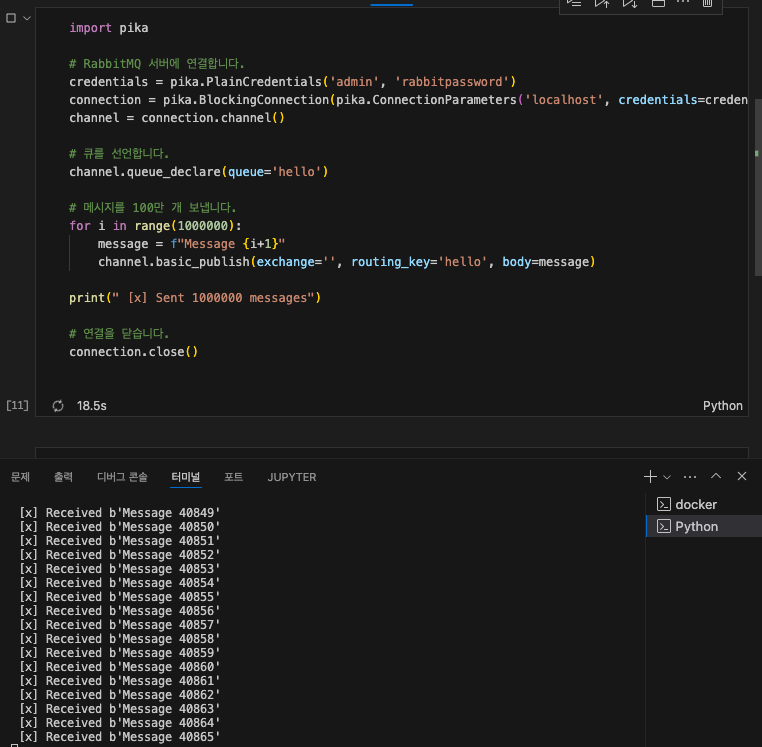
최대 4000개의 생성과 consume 하고 있음.

RabbitMQ에서 메시지는 큐에 한 번만 전송되고, 해당 메시지를 처리한 후에는 큐에서 삭제됨.
그래서 하나의 큐에서 메시지를 동시에 두 곳에서 받는 것은 기본적으로 불가능.
그러나 RabbitMQ에서는 팬아웃(exchange fanout)이라는 exchange 타입을 사용하여 여러 큐에 동시에 메시지를 전달할 수 있음.
이를 통해 메시지를 여러 곳에 복제하여 동일한 메시지를 여러 큐에서 받을 수 있음
fanout 사용 예
import pika
import json

# RabbitMQ 서버에 연결합니다.
credentials = pika.PlainCredentials('admin', 'rabbitpassword')
connection = pika.BlockingConnection(pika.ConnectionParameters('localhost', credentials=credentials))
channel = connection.channel()

# 팬아웃(exchange fanout)으로 선언합니다.
channel.exchange_declare(exchange='logs', exchange_type='fanout')

# 보낼 데이터를 딕셔너리 형태로 생성합니다.
data = {
    'message': 'Hello, RabbitMQ!'
}

# 딕셔너리를 JSON 문자열로 변환하여 보냅니다.
message = json.dumps(data)
channel.basic_publish(exchange='logs', routing_key='', body=message)

print(" [x] Sent message:", message)

# 연결을 닫습니다.
connection.close()
어드민 화면에서 fanout으로 생성된 logs 큐 확인 가능.
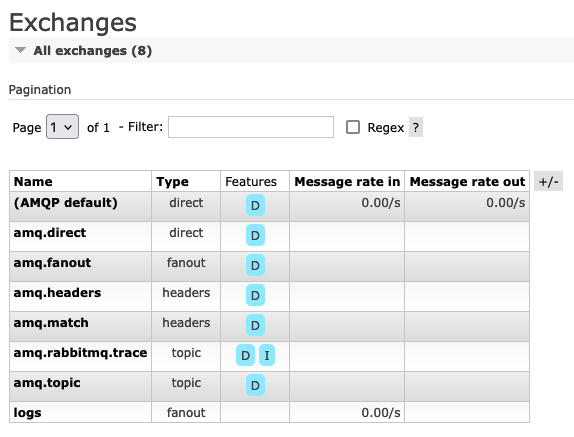
팬아웃(exchange fanout)은 연결된 모든 큐로 메시지를 전달
팬아웃으로 선언된 exchange에 메시지를 보내면 해당 exchange에 바인딩된 모든 큐로 메시지가 전송. 이는 exchange에 연결된 모든 basic_consume가 메시지를 받게 됨
import pika
import json

def callback(ch, method, properties, body):
    data = json.loads(body)
    print(" [x] Received by Consumer 1:", data)

# RabbitMQ 서버에 연결합니다.
credentials = pika.PlainCredentials('admin', 'rabbitpassword')
connection = pika.BlockingConnection(pika.ConnectionParameters('localhost', credentials=credentials))
channel = connection.channel()

# 큐를 선언합니다.
result = channel.queue_declare(queue='', exclusive=True)
queue_name = result.method.queue

# 팬아웃(exchange fanout)으로 선언된 'logs' exchange에 바인딩합니다.
channel.queue_bind(exchange='logs', queue=queue_name)

# 메시지를 받을 콜백 함수를 등록합니다.
channel.basic_consume(queue=queue_name, on_message_callback=callback, auto_ack=True)

print(' [*] Waiting for messages by Consumer 1. To exit press CTRL+C')
channel.start_consuming()
메시지를 확인 후 다시 큐로 보내는 코드.
basic_reject() 메서드를 사용
basic_reject() 메서드의 requeue 파라미터를 True로 설정하여 해당 메시지를 다시 큐로 보냄.
import pika
import json

def callback(ch, method, properties, body):
    data = json.loads(body)
    print(" [x] Received:", data)

    # 메시지 처리 후 실패했을 경우, 해당 메시지를 다시 큐로 보냅니다.
    ch.basic_reject(delivery_tag=method.delivery_tag, requeue=True)

# RabbitMQ 서버에 연결합니다.
credentials = pika.PlainCredentials('admin', 'rabbitpassword')
connection = pika.BlockingConnection(pika.ConnectionParameters('localhost', credentials=credentials))
channel = connection.channel()

# 큐를 선언합니다.
channel.queue_declare(queue='hello')

# 메시지를 받을 콜백 함수를 등록합니다.
channel.basic_consume(queue='hello', on_message_callback=callback, auto_ack=False)

print(' [*] Waiting for messages. To exit press CTRL+C')
channel.start_consuming()
'server > 아키텍쳐' 카테고리의 다른 글
| rabbitmq 심화 (persistent / cluster) (0) | 2024.05.05 |
|---|---|
| airflow scheduler high cpu usage (1) | 2021.11.29 |
| 캐시 (0) | 2021.07.14 |
| Consistent Hashing (일관된 해싱) (0) | 2021.07.12 |
| airflow 시간대가 다른 두개의 dag을 ExternalTaskSensor 사용하기 (0) | 2021.04.16 |


